Filipino-inspired flavors: Sans rival macarons
My apologies for the late post.
Those of you who have read my recent post last week regarding my wrinkly macaron misadventure might be wondering what on Earth I was doing, grinding cashews and using peanut flour… Well, I was experimenting on transforming a favorite Filipino layered cake, Sans rival, into a macaron. Sans rival is basically made up of alternating layers of meringue, buttercream, and toasted nuts (usually cashew nuts, or peanuts); so converting it into macaron form is quite easy. The complications arise with the ingredients you use, particularly with the type of nutty meal/flour: while you can use virtually any finely ground nut or nutty seed, it should neither be too wet/moist nor too dry. Last week’s misadventure was the result of a minute quantity of moisture in the ground cashews, which could have been avoided had I checked the cashew meal’s consistency and oven-dried it a bit if it tended to clump together too much (I didn’t check and skipped oven-drying because I was to eager to get on with it).
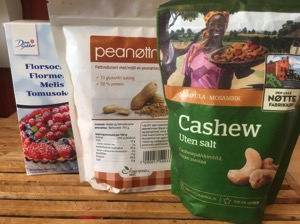 Earlier this week, I also found out that using ground nuts that are too dry could also lead to even worse problems. Since I didn’t have dry-roasted cashews on hand, and I didn’t want to dry the cashew nuts that I have in the oven for an additional 5-10 minutes at lowest temperature, I decided to give the experiment another try using just the peanut flour that I already had. The problem was, the peanut flour was fat-reduced. I thought, no biggie; excess moisture is the only macaron Waterloo, right? Wrong! Just imagine how aghast I was when the batter turned into the consistency of shortcrust pastry dough during macaronage! I tried to salvage the situation by adding a bit more eggwhite, but that only made it worse. I ended up discarding the lot, and starting out again from scratch—this time, using 2:3 ratio of fat-reduced peanut flour to almond flour.
Lessons learned:
- There is no such thing as short cuts when making macarons. It really takes time. Do the test: pinch the ground nuts between your thumb and index finger—if it clumps together into a ball and does not break down back into a powdery consistency, it is too moist and you’ll have to dry it in the oven.
- DO NOT USE FAT-REDUCED NUT FLOURS (whether peanut flour, or almond flour). If you can’t find ready-made nut flours that are not fat-reduced, buy regular nuts then shell, roast, and grind them yourself.
____________________

Sans rival macarons
Almond-peanut macaron shells
Makes about 40 shells (20 filled macarons)
60 g finely ground almonds (almond meal/flour)
40 g finely ground peanuts (peanut flour)
100 g confectioner’s sugar
37 g egg whites (from approximately 1 egg)
100 g granulated sugar
37 g egg whites (from approximately 1 egg)
25 g water
- Line baking trays with baking paper, silicone macaron mats or silpat (I used silpats).
- Tant pour tant: Grind the ground almonds and peanuts, and confectioner’s sugar in the food processor. Sift the mix into large bowl. Place the pieces that won’t go through the sieve back in the food processor and process until everything goes through the sieve. Make a well in the center of the tant pour tant.
- Pour the egg white mixture in the middle of the tant pour tant but do not mix. Set aside.
- Italian meringue: Place the water and sugar in an appropriately sized saucepan. Place a digital kitchen thermometer (I used a digital meat thermometer with an alarm function) in the center of the pan with the sugar mixture, and heat over medium heat until the sugar syrup boils and reaches a temperature of 118°C. DO NOT STIR, but you can swirl gently.
- Place the second batch of egg whites in the bowl of a standing mixer fitted with the whisk attachment. When the sugar syrup temperature reaches past 112°C, begin whipping the egg whites at high speed until soft peaks form.*
- As soon as the sugar syrup reaches 118°C, remove from heat and pour in a thin stream into the egg whites while continuing to beat at high speed. Beat one more minute, then lower the speed to medium and beat for about 2 more minutes. Cool to 50°C (or lower) before adding into the tant pour tant.
- Macaronage: Add the meringue to the tant pour tant. Using a spatula, fold the meringue into the tant pour tant then from the center, move the spatula towards the side, pressing the batter against the side of the bowl, while rotating the bowl. Next, scrape the batter from the sides and bring it towards the center. Repeat this fold, press and scrape action while rotating the bowl until the batter becomes shiny and homogenous in color.
- Once the batter is shiny and homogenous, check for the consistency. Using the spatula, lift a small amount of batter and let it drop from the spatula. If the batter drops in clumps, fold a couple more times then check again. The batter is ready for piping when it drops from the spatula in ribbons that smooth themselves back into the rest of the batter within 15-20 seconds. Alternatively, check how the batter flows: tip the bowl slightly to one side and watch how the batter moves. If the batter moves like slowly flowing lava, it is ready.
- Spoon or pour the batter into a piping bag fitted with an 11-12 mm diameter round nozzle (Wilton 1A or 2A), taking care not to add air bubbles into the batter as you are doing so.
- Pipe out 35 mm circles, each about 20 mm apart, onto the prepared baking sheets.** Rap the sheets on the counter top to smoothen the tops of the macarons (in case there are stubborn peaks that formed while piping) and to dislodge/remove excess air from the batter.
- Croûtage: Let the macarons rest for 15-30 minutes,¨ or until they have formed a thin crust, their surfaces are dull in color and are no longer sticky when touched.
- Preheat the oven to 150°C-160°C (this depends on your oven; mine is hotter than what it says on the dial, so I use 150°C).
- Once the oven is done preheating and the macarons are dry and ready, place one of the baking sheets on the lower third of the oven—you can only bake one sheet at time. Bake for 10-12 minutes (again, this depends on your oven; in my case, I check for doneness after 10 minutes), briefly opening the oven at least once after 8 minutes to let out steam/moisture. The macarons are ready when the tops are firm to the touch and the tops do not move too much from side to side.
- Remove from the oven and slide the baking paper/silicone/silpat with the macarons still on it from the baking sheet onto a wire rack. Let the macarons cool on the baking paper/silicone/silpat. Once cooled, they can be removed easily from the baking surface (peel the baking surface from the macarons, and not vice-versa); any macaron with the bottom still stubbornly sticking to the baking surface is undercooked—pop them back into the oven and bake a couple more minutes.
- Pair the finished macarons and allow to rest on wire racks with half of them lying foot side up. Cool completely before piping the filling.
Vanilla buttercream
2 egg yolks
67 g caster sugar
1 tsp vanilla extract
84 g (3 oz.) unsalted butter, diced into 1 cm cubes, at room temperature
- In a bowl, beat the egg yolks with the caster sugar at high speed until the mixture becomes fluffy and doubles in volume.
- Pour the egg mixture into a saucepan over medium heat. Add the vanilla extract and stir continuously until the mixture forms a uniform and compact batter.
- Pour the batter into a shallow dish, cover with a plastic wrap, and let cool in the refrigerator.
- In the bowl of a standing electric mixer fitted with a paddle attachment, beat the unsalted butter at high speed until light and creamy, then add the chilled vanilla batter. Continue whipping until the mixture becomes homogenous.
- Spoon into a piping bag fitted with 8 mm diameter round nozzle (Wilton 2A). Store in the refrigerator until ready for use.
Assembly
- Pipe the buttercream onto half of the macarons (those with the foot side facing upwards), leaving about 3 mm from the edges and the center free.
- Top with the remaing macarons.
- Roll the sides of the macarons in chopped/coarsely ground cashew nuts.
- Leave the macarons to «mature» with the fillings for 24 hours, or at least overnight.


Comments